3 Steps for Editing My DSLR Photos*
I like taking photographs, I always have done. I don’t know why but I value capturing a moment so I can remember it forever. When I was a teen I was always the one taking my camera out for nights on the town. Once upon a time it was a disposible camera, I’d buy one for each night out and I’d always get the photos printed. Then it was a digital camera, I would carry it around in my handbag and capture everything. I knew exactly how to get my photos from my camera to my computer, before the time of apps on you phone. If you’re unsure these days you can always use Google and find a guide, such as How to Transfer Images From Your Lumix. Now I have my iPhone 8, where I can upload photos straight onto social media, or I have my DSLR which I use for photos I will want to print and decorate my home with.
If you’re a complete novice when it comes to editing photos, you could always take a course online with the likes of PHLEARN. If you wish to take photography at a more advanced level taking a course could be a great investment.
I like to edit my photos, and I love that there are free tools available as apps on your phone or online, to ensure you get the best out of every single image you take. My phone photos I usually simply touch up, but I take my time when editing my DSLR photos. I’m by no means a professional photographer, I just get pleasure out of this hobby and today I thought I’d show you three tools I use to edit what I’ve taken my camera.
I use a website called PicMonkey and I pay a monthly subscription to it. It’s simple to use even for beginners.


Adjust the Exposure
This photo of Princess Aurora during the Festival of Fantasy parade in Magic Kingdom was taken on a particularly overcast day just after a down pour back in May. The photo came out dull and pretty dark despite using the best settings for that weather. Aurora looks beautiful and since it’s so rare that she’s ever in the parade I wanted to salvage it. The best way for me to do this was to adjust the exposure. I increased the brighteness and highlight first, then increased the contrast to bring some colour back into it rather than the muted colour of the original. I could have gone brighter but I’m nota huge fan of over exposed photos.
Adjust Colour
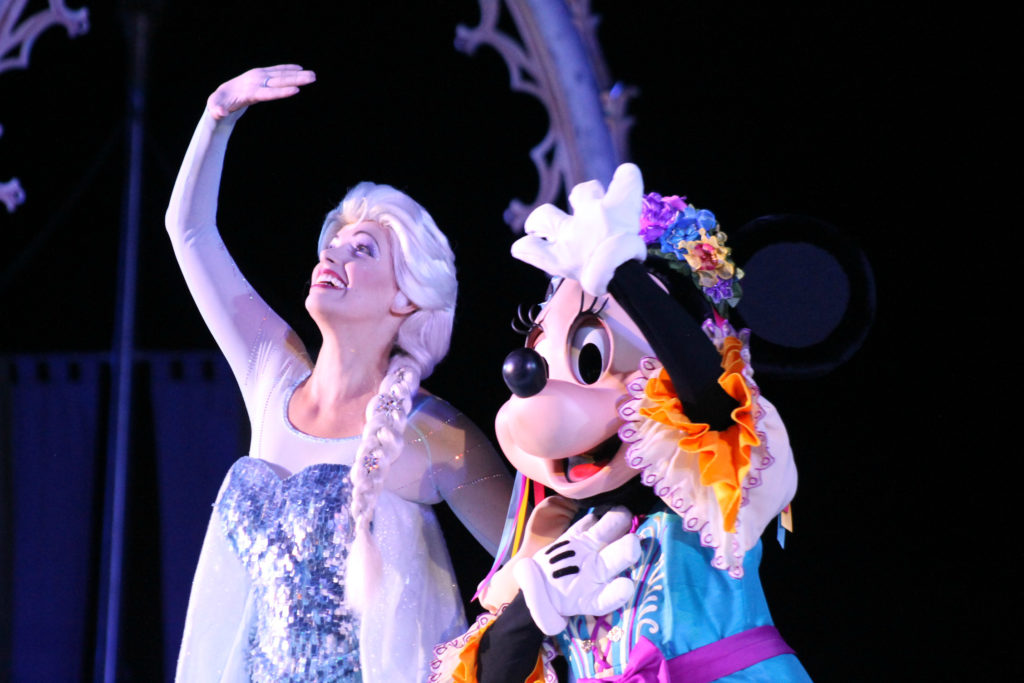
I took this photo of Elsa and Minnie back in October 2016. It was my first time ever shooting a night time show and I was impressed how the photos came out, but some of the colours were off due to my camera picking up some lights more than others. It made some of my photos have a blue tint, and others with an orange. To fix this I needed to play around with the colours. This is a lot more subtle than changing the exposure and it took a fair bit of trial and error to get it right. On PicMonkey I have the option of a “neutral picker” this allows me to tone the whole photograph to a certain colour. By simply selecting a white shade I was able to get rid of the blue tint, and then it was just a matter of adjusting the saturation and temperature to get more natural colours.
Crop the Image
Back in May, Peter Pan was roaming around Fantasyland at Magic Kingdom which meant on a few occassions LM would run off and have adventures. I knew she was in safe hands so I let her live out her little Peter Pan dreams, but this also meant that a lot of my photos were taken. Distance photos are a bit of a pain at Disney as there are always people around so by cropping it’s a great way to get rid of those and bring a background subject into the front. I cropped it so Peter and Little Miss appear closer and I tidied it up a bit with colour and exposure. I love seeing Little Miss in a world of her own.
Editing is time consuming, but it’s worth it especially if you want to keep your photos forever, or print them out. Even though we live in the age of being able to delete photos as we go, sometimes the subject moves and you miss you shot, so being able to edit can often salvage photos you were tempted to discard.
How do you edit photos?
